This chapter introduces how to use Shade for dealing with the three-dimensional light effect.
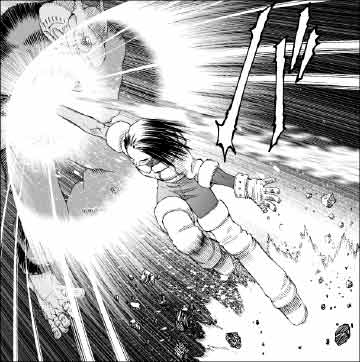
In BAA LastOrder, since the punches thrown by characters including Gally (Alita) often exceed acoustic velocity, the concentric-circled shock waves are described as that expression. Since those three-dimensional looks can't be expressed only by transforming on Photoshop, we need to rely on the ability of Shade.
|
In order to adjust the exact perspective by Shade, scan the draft to duplicate, threshold it to strengthen contrast and save it in PICT format*. Use this as a template for Shade.
|
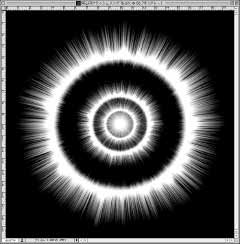
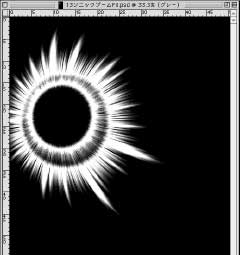
Prepare the original image of the shock wave. Create the concentric-circled image by applying the method explained in Basic technique 2 "Gathered lines." Be careful of its resolution, which should be high to some extent, or pixel noises can be seen after rendering. Save it in PICT format.
|
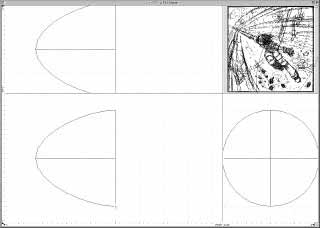
Open the draft, which was saved beforehand, from "Import Template" in Shade, and display it on the projection at the upper right of the four-view figure. Create a hemisphere-like form. While looking at the projection, move the position of the camera to match the perspectives.
Though I didn't do in the example, duplicating the form, polygonizing and setting it not to be rendered make it easy to adjust a perspective while grasping the surface. Moreover, setting joints etc makes it easier to adjust delicate positions.
|
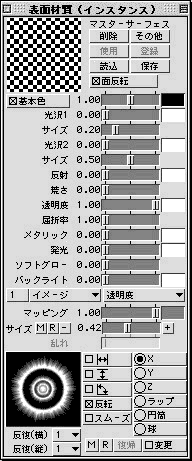
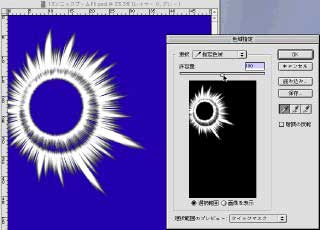
Set the form's surface material as shown above. Select black for basic color and make transparency into the maximum. Click the "Others" button and set up not to add shading. Projection-map from the front of the form, import the same concentric circle image in "transparency" and "diffuse", and set it as the completely same position and size.
|
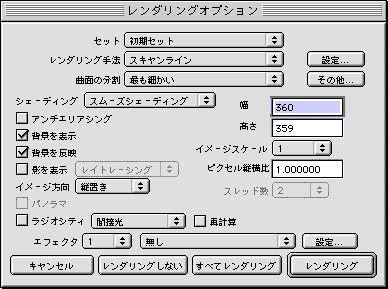
Select "scan line" and "display background" and try test rendering for several times to adjust. If it seems to be good, set the size of the image to the size required in 300 dpi, choose "finest" at "divide curved surface" and render it.
|
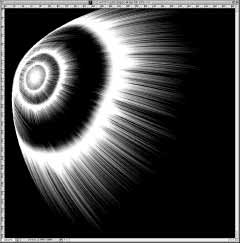
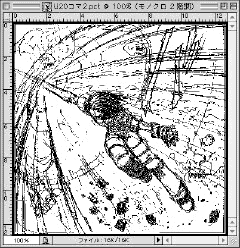
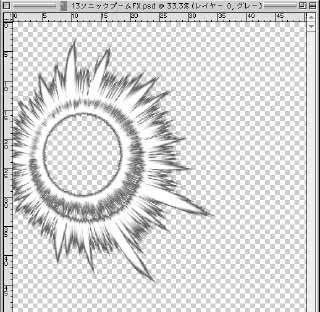
When you get an image like the above one, save it. Open it in Photoshop, scale up to 600 dpi, paste on a work file and compose screens to finish.
|
The technique of simply composing screens doesn't work unless backgrounds are dark to some extent. So I explain the method to add color to outlines, which is effective when a background is white. Let's make an effect like the example above.
|
The work in Shade is basically the same. In the example, I created two basic forms and arranged them with their positions slightly shifted to enhance depth feeling.
|
Open the image in Photoshop, select gray scale mode and double-click the "Background" of the layers palette to change into a layer. Choose "Selection" menu -> "Color Range," click the black portion of the screen, and set the slider of the "fuzziness" to around 100.
|
Click "OK" to make the masked area to be selected, and hit the delete key to transparentize it. You may use as it is, but let's thin the color because the tone of the outline is somewhat strong.
|
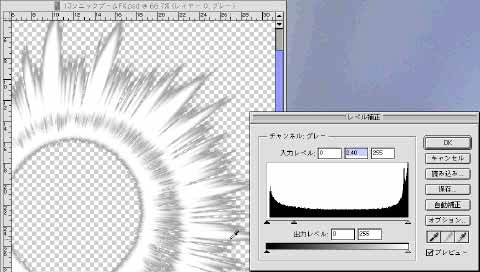
Select "Image" menu -> "Adjustments" -> "Levels." Click the deepest-colored portion of the outline tone with the eyedropper cursor, which you can change from the pointer by moving outside of the dialog.
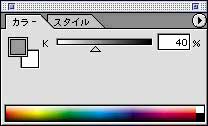
Since the collected color is displayed on the color palette, move the neutral colors' gauge (the middle one of three triangles) at the level adjustment to the left. That move interlocks the Color palette and changes the color. Set it around 40% and click "OK." Paste this on a work file and it's finished.
|
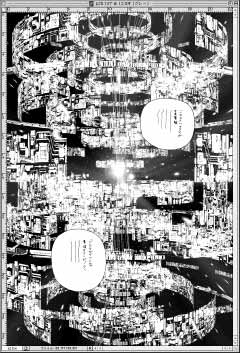
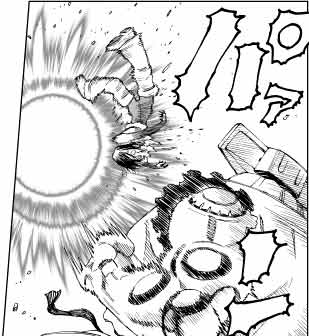
For the method of using 3D software together, various applications are possible. The example above is a scene from PHASE: 11 in BAA LastOrder Vol. 2. I made this basically the same methods as those I've introduced here.
By Yukito Kishiro
|
