This chapter explains how to use Adobe Illustrator's new feature "3D Effects" to create three-dimensional move lines.
Ribbon-like move lines such as one in the above figure can't be made with the method of applying the art brush to paths (the 6th "Move lines created by using Illustrator"). You could make it with 3D CG software such as Shade, but edges would blur when processing high resolution, so it would be difficult to create sharp move lines. Therefore, let's use the new feature "3D Effects" introduced in the recent Illustrator CS.
Place the original form of a move line. It is desirable to draw details properly even the portion smeared away with white color. (In the example, I placed a colored background form in order to show the white portion.) Select the move line and register as a new symbol.
|
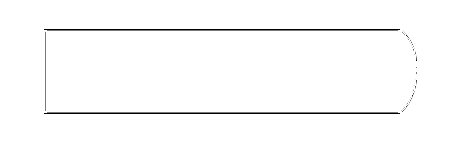
Draw the cross section of a solid of revolution. Use the Rectangle tool to create a square path. Lines and painting would be cancelled later, so you can set them up as they are easy to see. Since the left side becomes the axis of rotation in the default setup, draw the path in consideration of it. In the example, I added some points at the right side to make it curve.
|
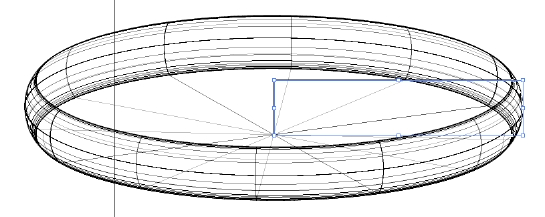
In Illustrator's menu, select "Effect" ->"3D" -> "Revolve. "Check "Preview" box in the dialog palette, and the solid shape as shown in the above figure is created. In the figure, the wire frames are displayed so that they are obvious, but pay attention that they may not be well displayed when you actually create move lines.
|
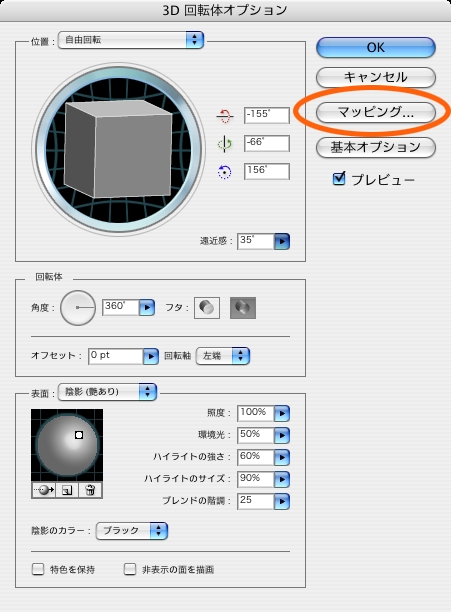
The above dialog is the 3D Revolve Options. Click the 3rd button "Map Art" on the right.
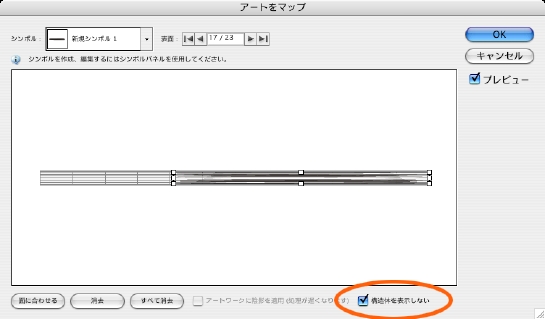
The dialog on which the solid's each surface was developed is displayed. Click the triangles beside "Surface" to display the surface that you want to map. In this case, the surface is the side of the disk, so the long and slender rectangle is displayed. The front side seen from the viewpoint is displayed in dark gray, and the back in bright gray. Select the move-line symbol that you registered before from the pull down menu of upper left "Symbol. "If it is too large or too small, click "Scale to Fit" at the lower left to fit the size. Drag the bounding box to adjust to arbitrary size. When you check "Invisible Geometry" at the lower right, the solid disappears and only the pasted map is displayed. Click "O.K."
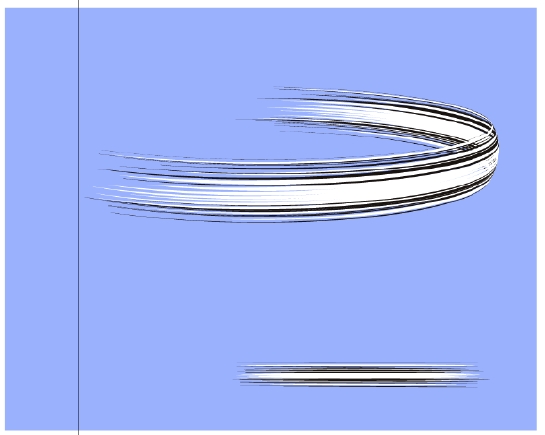
It is displayed as shown in the above figure. After that, drag the cube in the option dialog to rotate or change the numerical value of "Perspective" according to the draft to arrange as it matches the drawing. If it becomes a satisfactory form, delete excessive things, such as the move line's original form and a draft layer, and save it. Open and use it in PhotoShop. Since it is vector data, you can get sharp image without antialiasing however high the image's resolution is. It is not good for expression with blur, though.
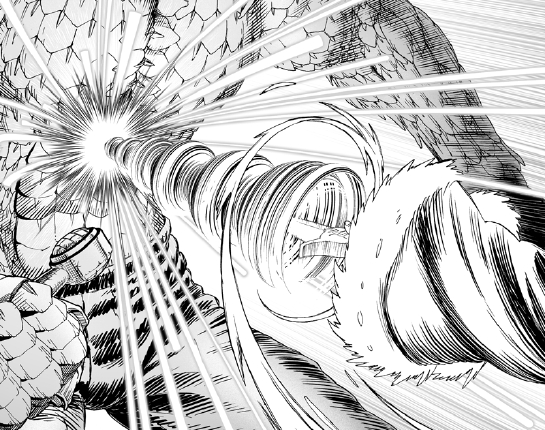
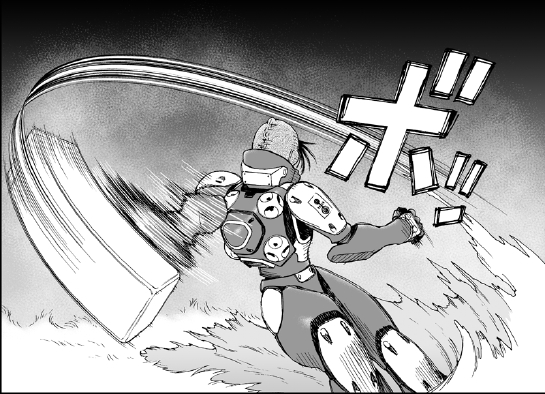
A picture above is a close-up of Vilma's ultimate arcanum "Ground Tumbling Screw Sword," also known as the common name "drill sword," in BAA LastOrder PHASE: 53. This move line was made with the technique of this solid move line as well.|
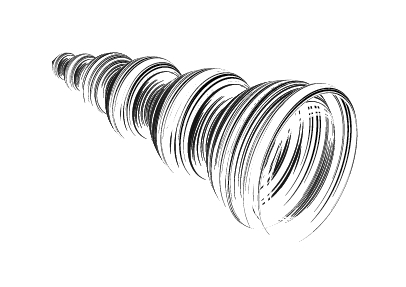
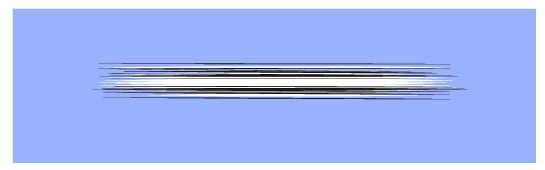
This image shows the move-line portion only.|
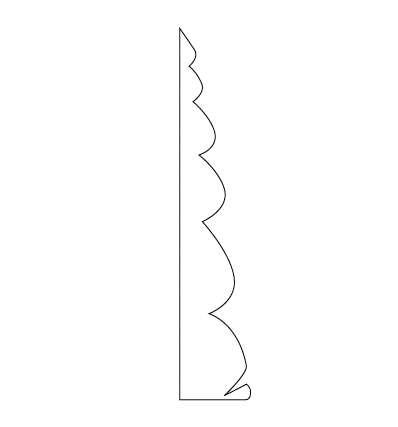
And this is the cross section of the move-line portion. When using Illustrator's 3D effects, each form will be arranged as different 3D space respectively, so if possible, you would express it better with one form.
By Yukito Kishiro
|
