This chapter introduces the applied technique using 3D CG software Shade*.
Let me skip describing how to use Shade, which you can learn from special handbooks. Here I will explain how to apply it to the drawing of comics.
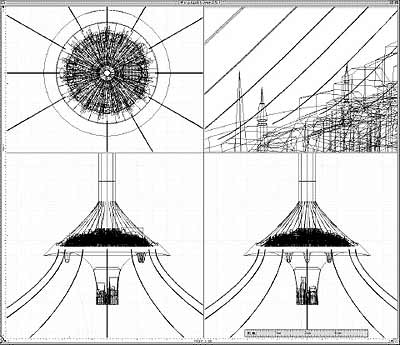
The above figure is Salem modeled by Shade. In order to use for a cover drawing of the GUNNM Complete Edition, I elaborately modeled quite details. However, the model is not suitable in comics as it is, so I use it as a template basically for drawing perspective.
|
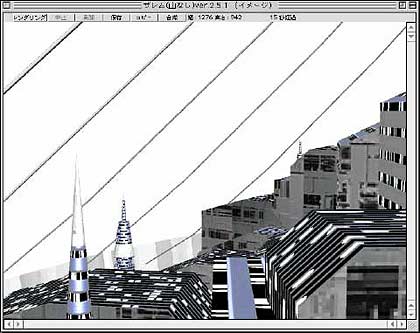
This image is the rendered section of the buildings. Set the size of the model to be rendered by calculating its size at 300 dpi. The only purpose with this is to print it out as a template, so 600 dpi is unnecessary. Moreover, 600-dpi work often exceeds the maximum rendering size of Shade. For spread drawings, even 300-dpi work is too big, so create models at the maximum size that you can render, then expand its size by Photoshop. Print it out and use it as a template of drafts.
|
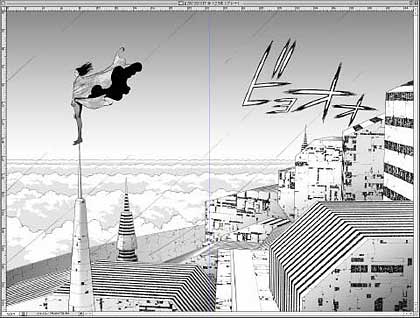
This is the final drawing (PHASE: 11 in BAA LastOrder Vol. 2). The first advantage of this method is the ability to draw correctly the objects that we have trouble to draw perspective. The second is that my burden is eased because once printing the template out, I can leave tracing the draft to my assistant. However, I model with Shade and set perspective by myself, so I wonder how much time is saved as a whole... The effect of reducing my mental strain may be significant.
|
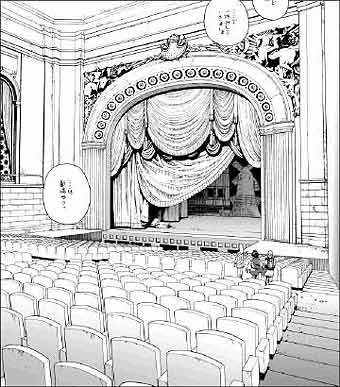
The above figure is a scene of the theater that appeared in PHASE: 04 in BAA LastOrder Vol. 1. The audience seats are located in rows. Drawing such scenes by hand would be troublesome, but those are where 3D CG is at its strongest.
|
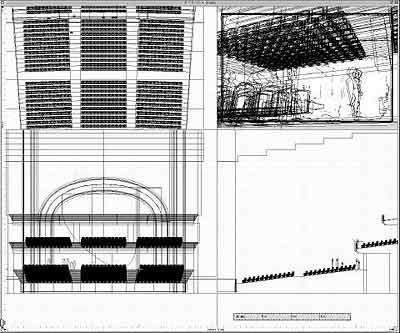
This image shows the theater modeled by Shade. I made one basic form, then copied and arranged them to create audience seats.
|
The image was rendered with the "anime shader" plug-in for Shade. I set "glow" of the surface material to 100% so that no shadows were displayed and only outlines came out. Since the anime shader for Shade is not perfect, the image is not satisfactory as it is to be used as a background. There were too many chairs on this scene and I estimated that it would be troublesome to trace and to draw by hand. So I printed it out, added some lines that had been insufficient on the paper by hand, and then scanned to use it. As for the back wall and the stage, I drew them by hand on another paper from scratch.
|
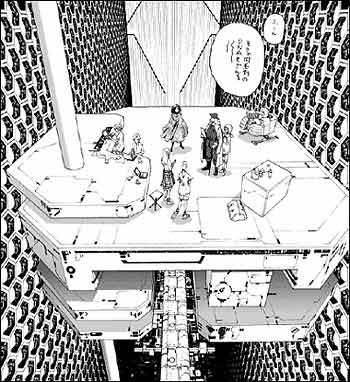
The above figure is a scene depicting Mother Machine from PHASE: 11 in BAA LastOrder Vol. 2. For the machine here, I rendered the image and thresholded it, which was used as it was.
|
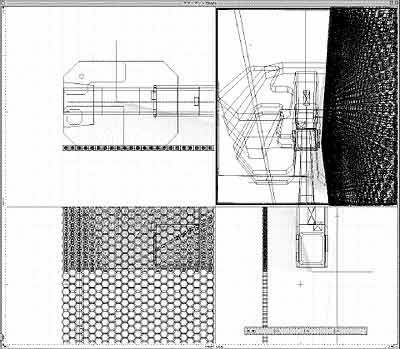
This is the model of Mother Machine. As for the honeycomb-patterned tanks, 280 pieces of them have contents and 484 fake tanks have only outside. Since the data was too heavy, I created only one surface of the walls, but still had to wait for tens seconds to redraw. For the opposite side of the wall, I used the reflect tool of Photoshop to create a mirror image from the rendered image.
|
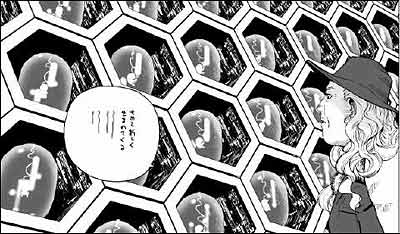
I processed the rendered image to use for the background of the above figure. In order to show the inside of the tanks, we apply some techniques.
|
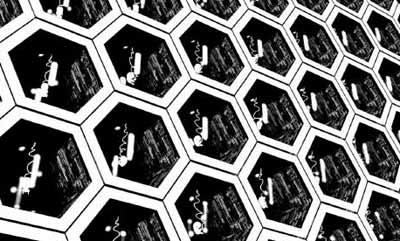
First, with the transparency of the tanks' surface material turned off, render it once. Choose "scan line" for rendering method.
Scale it up to 600dpi then threshold by Photoshop.
|
Next, with the transparency of the tanks turned on, render it again. Choose "ray tracing" for rendering method.
Since we'd like to use the gray gradation that appeared in the highlight of the tanks, avoid thresholding. It's enough to adjust gradation in Photoshop, operating "Image" menu -> "Adjustments" -> "Posterize".
|
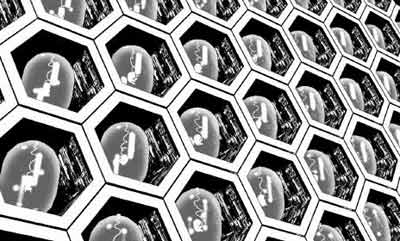
Make the selected areas on the tanks of the first thresholded image, and paste the ray-traced image on it.
In order to make the tanks stand out, add whitish highlights on all of them.
Now the portion of the honeycomb frame got sharp lines without antialiasing, and the image of the tanks' inside got gray gradation.
To create backgrounds of comics with 3D CG, there are some conditions.
#1 Relatively simple shape (easy to model)
#2 Difficult to draw perspective, or the same forms in large quantities
#3 Things appearing repeatedly in the comic
About #1, I judge for now it's appropriate to avoid modeling of organic forms, seeing the balance of modeling efficiency and the quality of output. However, 3D CG software may have epoch-making progress in the future, and the day when it becomes natural that characters etc. are created in 3D may come.
#2 means the scenes predicted that drawing by hand would be extremely difficult or too much time required. There is a trade-off with the time and effort of modeling, but if the scene is definitely needed, you must use 3D CG or whatever to draw.
Good examples for #3 are Salem and Jeru (TIPHARES), of which shapes are hard to draw by hand, but fit to create in 3D CG. Furthermore, since they appear repeatedly, even if you spend considerable hours to model them, you'll be fully rewarded. However, there is no meaning of taking trouble to 3D-model stuff such as spacecraft that appear in the corner of a panel only once.
3D CG is an attractive field that continues to develop dramatically. The introduction of 3D CG in comics has not yet progressed very much compared with that in games, movies, animation etc., but it may become common that assistants specializing in 3D modeling reside permanently in the future.
By Yukito Kishiro
|
