This chapter explains a few ways of drawing stealth soldiers, so called "optical camouflage," though it lacks in versatility.
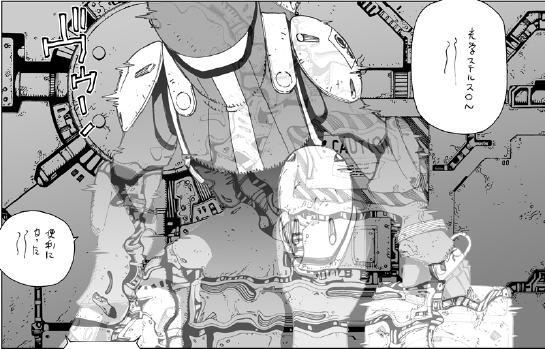
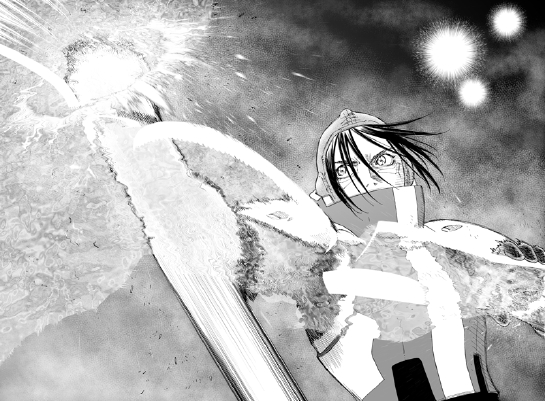
The image above is a scene from BAA LastOrder PHASE: 36. In the case of this drawing, I made a finely described background and the stealth-camouflaging character in the separate files, and used a gradation layer mask to blend them.
Duplicate the layer of the background image in Photoshop and enclose with the selected area that was made of the character's outline. Go to "Filter" -> "Liquify" in the menu and use its brushes to liquify the image manually. In spite of not doing special things, "Liquify" filter needs extremely heavy processing. Therefore, you had better separate the processing panel to another file rather than to work directly on manuscripts. When using this way, you can create strong impressing drawing. But you won't be able to express distortion unless you prepare darker and quite finely drawn backgrounds. Therefore, this technique is for crucial panels but not for mass production.
|
In the above figure, I prepared black painting out portion of the suit and the portion of Gally's eyes separately, and just tone-processed them on the work file. This way is easy, and by smearing away in 10 to 20 % gray, it allow you to express even if a background is light. We call it "stealth camouflage," but if it disappears completely, you don't have to draw it in the first place. Since you draw what is not visible in fact, you need comic's way of "lies for expressing."
|
In the above figure, I used more elaborate way. Preparing the suit portion of black painting in another file to make a selected area is same, but I used the "water surface" texture to express the distortion feel.
|
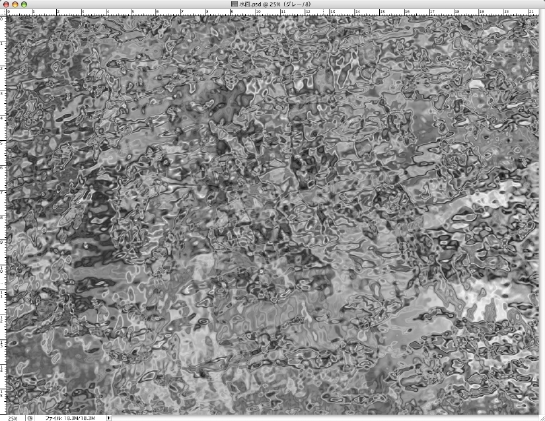
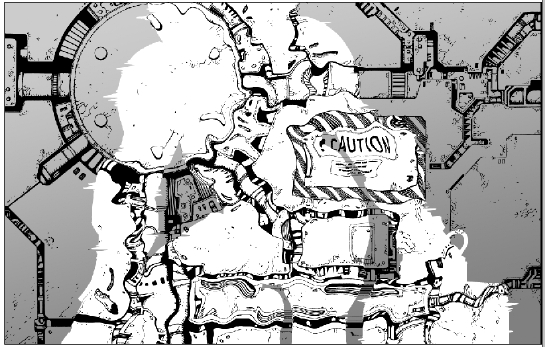
An image above is the water surface texture which I made with the application of filter "Sketch" -> "Chrome" to filter "Render" -> "Clouds." The texture, which I originally made for "Aqua Knight" years ago, is still helpful in various situations. Paste this on the selected area of the suit, change layer transparency, or duplicate layers to blend screens. For the distortion of the background image, use filter "Distort" -> "Displace." Enter arbitrary numerical values in horizontal scale and vertical scale boxes on the dialog, click "OK" to open another which dialog for selecting displacement map data, and select the "water surface" texture saved in the hard disk. Then, the background image changes according to the gray density of the displacement map image. Its random nature may become high and you may have trouble with distorting it according to your intention, but you can change only with filters, so it is better for mass production than using "Liquify" filter.
Since the image above is sized for a spread, changing manually with "Liquify" filter is not realistic. You can distort even big images like this without stress by using the displacement map.
Please study and devise your own technique.
By Yukito Kishiro
|
