This chapter introduces how to make the tone in which the tone technique of classic hand work is reproduced with the digital finish.
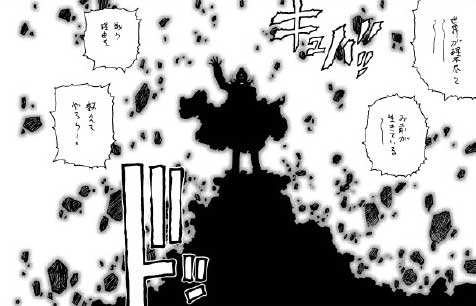
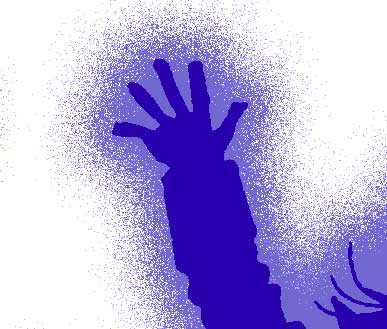
It is making of the tone of figure above. This tone begins to be along the outline of subject.
This expresses having of the opponent of the subject of the object strong light.
The technique for expressing the backlight by overflowing and putting the tone thinks that Mr. Katsuhiro Ohtomo invented it of the outline. This is an excellent method of making use of the restriction of the Japanese cartoon expressible only by black and white.
Actually, it doesn't become it like this in the backlight. It blots as light invades subject.
Such an expression can be easily done in digital finish. However, I think well if the reader is very told my image for the first. It is necessary to use a conventional mode of expression flexibly.
The Auto Select tool is chosen.
The permissible value is one. The check on Anti-alias is removed.
In the line drawing layer, the background of the picture that should stand out is clicked with the Auto Select tool.
The range of the selection is reversed by "Range of the selection" menu - "The range of the selection is reversed".
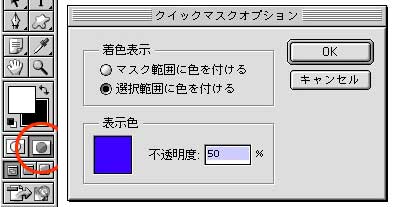
Under the toolbox, there are two icons like a round object.
A right round object is clicked. Then, it changes into the quick mask mode.
In the state of default, a red color attaches outside the selection range. Eyes do glittering when working for a long time because the color is red. Therefore, it is easy to see and sets it.
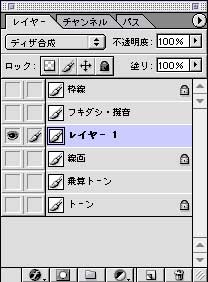
It puts it out ahead pushing "Channel" tab of the layer palette in the state of the quick mask mode.
The pull-down menu comes out when a triangular mark in the upper right of the palette is pushed. "Quick mask setting" is selected, the check is put in "Sweeten the pie within the range of the selection", and the display color square is clicked. And, delicate colors are chosen from the color picker gently to eyes. I chose blue near purple.
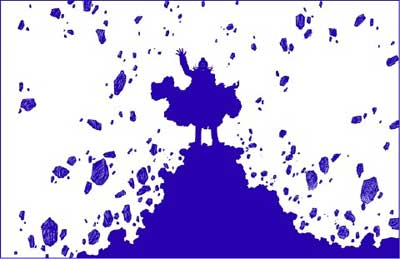
Then, it is sure to become as shown in figure above.
A quick mask is a super-strong function that it is possible to process it by visualizing the range of the selection, and using the brush and the filter just like the bit map while referring to the picture below.
Remembering by Keyboard short-cut might be good because it uses it frequently.
It is alphanumeric character mode, and it is "Q."
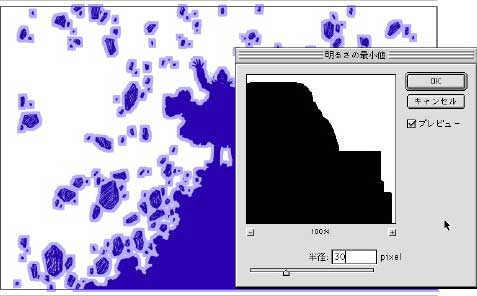
The menu of "Filter" - "Others" - "Minimum value of brightness" is chosen.
The radius is set to 30 pixels.
Next, it operates it as follows.
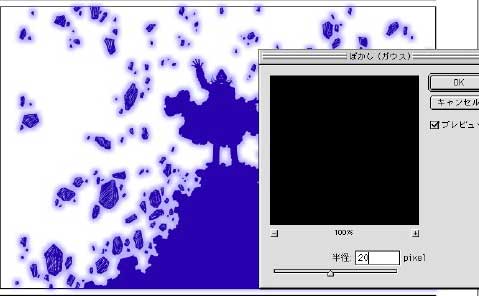
The menu of "Filter" menu - "Shading off" - "Shading off (Gauss)". And, it shades it off by 20 pixels in the radius.
It becomes good finished in the so much in the monitor. However, the effect of shading off is not smoothly printed in the print of the magazine, and the boundary of white and the gradation divides clearly.
Then, work is added in addition.
It returns from the quick mask mode to the ordinary mode.
A new layer is made, and the range of the selection is painted out with 100% black.
You may release the range of the selection.
The method of synthesizing the layer is made "Dither synthesis".
All other layers are made non-display.
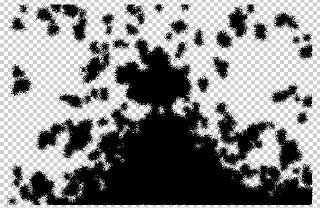
Then, the effect part of shading off is expressed by the dot, and it becomes as shown in the above figure. This is a concealed effective technique.
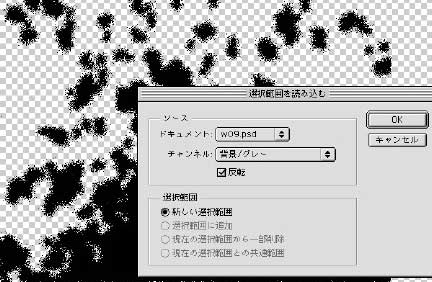
"Range of the selection" menu - "The range of the selection is read" is selected.
It is confirmed that the channel of the dialog box is "Background / gray". The check is put in "Reverse", and "OK" is pushed.
The range of the selection shaded off by the effect of an outline rugged dither is sure to be made.
It makes to the quick mask mode and it confirms it to make sure.
The above figure is the expanded time base sweep.
The range of the selection is sure to protrude beyond the scene when the effect of "Minimum value of brightness" is put for the divided picture. Then, let's do not forget, delete the protruding part, come off the quick mask mode, and preserve it in the alpha channel.
Because layers as new ahead made are unnecessary, it deletes it.
It paints out and it completes it in the gray of 20% to 40% Gray-tone-layer. (It is made to 40% gray in the example.)
A similar print result is obtained shading off and the processing of the shading off tone to which the effect of the dither is performed with the sand-eraser of an analog tone.
A similar effect is achieved even if the brush tool is made a dither synthesis mode, and it paints it in the hand work.
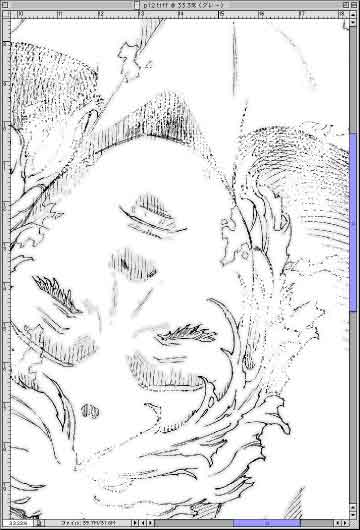
When the profile line of subject was complex, work to put the tone by analog work was extraordinary work.
The example like the above figure can be made the digital processing and easily, too.
"Background/gray" channel is converted by "The range of the selection is read" within the range of the selection for the line drawing layer.
It was only made fat a little with "Minimum value of brightness" filter in the quick mask mode.
(Because the width of the tone is neither narrow, neither shading off nor the dither is processed in the example.)
I want you to research each one because the selection range making technique for making good use of a quick mask is the one that is basic.
By Yukito Kishiro
|
